As I sifted through the various pieces of software that are designed for creating presentation slides, it occurred to me: why learn yet another program, when I can instead use the tools that I'm already familiar with? With a bit of fiddling, we can easily create beautiful presentations with HTML and CSS. I'll show you how today!
0 - Directory Structure
Before we get started, let's go ahead and create our folder structure; it should be fairly simple. We'll need:
- index.html
- css/style.css
- js/scripts.js
- img/
- slides/
A simple base template. Your slides/ directory can remain blank for the time being. We'll fill that shortly.
1 - Beginning Markup
Let's begin by creating the base markup for our presentation page. Paste the following snippet into your index.html file.
<!DOCTYPE HTML>
<html>
<head>
   <meta charset="utf-8">
   <link href="style.css" rel="stylesheet" />
   <title>My Great Presentation</title>
</head>

<body>

 <div class="wrap">
   <div id="slides">
      <!-- load in slides -->
   </div>
 </div>

<script src="https://ajax.googleapis.com/ajax/libs/jquery/1.5.2/jquery.min.js"></script>
</body>

</html>
Above we have some clean, HTML5 goodness. No more type attributes in our script and link elements, short DOCTYPE, a laughably simple meta charset tag, etc.
2 - Slides
The
load()method is an AJAX method that loads data from your server, and inserts the returned HTML into the selected element.
Now you might be wondering how we're going to deal with each slide. We have a couple options here. While we could wrap each slide in its own div, and place a massive block of HTML within the #slides container, my instinct is that this will make the process of editing individual slides more time consuming, as we then have to hunt through all that markup for the slide that we need.
Instead, for this tutorial, I've opted to place each slide within its own .html file. We can then use jQuery's load() method to bring in each slide, and append them to our container.
Create a handful of numbered HTML files, and place them within your slides/ directory, like so:
- slides/
- 0.html
- 1.html
- 2.html
- 3.html
- 4.html
Within each of these files, we'll insert the markup for your desired slide. As an example, together, let's create an "About Me" slide.
1.html
<div>
   <h3> About Me</h3>
   <ul>
      <li> Nettuts+ Editor</li>
      <li> Envato Marketplaces Manager</li>
      <li>Wicked WordPress Themes</li>
      <li>Theme Tumblr Like a Pro</li>
   </ul>
</div>
Feel free to mix and match how you wish.
3 - Load the Slides
Before we can focus on the styling of our presentation, we need to load those slides into our document with jQuery. But rather than creating a bunch of global variables and methods, we'll store everything in an object, called Slides.
var Slides = {

};
Next, the process of loading those slides into our document will be stored within, say, a loadContent() method. Let's create that now.
var Slides = {
   loadContent : function() {

   }
}
To load all of the slides within the slides/ directory, we first need to know how many slides there are; though, JavaScript doesn't have the ability to access the file system. Instead, we'll pass in our total number of slides when we initiate our object.
With that in mind, let's create an init() method that will serve as our controller, of sorts. This method will also receive an argument that specifies the total number of slides. This will then be assigned to a property of our Slides object.
var Slides = {
   totalSlides : '',

   init : function( totalSlides ) {
      // If nothing was passed to this function, we can't continue.
      if ( !totalSlides ) throw new Error('Please pass the total number of slides to the init method');
      Slides.totalSlides = totalSlides;

      // Load the slides
      Slides.loadContent();
   },

   loadContent : function() {

   }
}
That's better. But, of course, none of this code will run until we call the init() method.
var Slides = {
   totalSlides : '',

   init : function( totalSlides ) {
      // If nothing was passed to this function, we can't continue.
      if ( !totalSlides ) throw new Error("Please pass the total number of slides to the init method");
      Slides.totalSlides = totalSlides;

      // Load the slides
      Slides.loadContent();
   },

   loadContent : function() {

   }
}

// All right; let's do this. We'll assume that we've created 6 slides, total.
Slides.init( 6 );
4 - Three Ways to Load the Slides
Let's take our first crack at loading these slides -- and then we'll slowly improve upon our code, as we continue.
loadContent : function() {
   for ( var i = 0; i < Slides.totalSlides; i++ ) {
      $('<div id="#slide-' + i + '"></div>')
         .load('slides/' + i + '.html')
         .appendTo( $('#slides') );
   }
}
Above, we're creating a new div element for the total number of slides that we've specified. Each div will have an id of #slide-n. After we've created each element, we then load the contents of the desired slide, which we stored within the slides/ directory. Once this block of HTML has been retrieved from the server, we append the newly created div to the #slides container.
We Can Do Better
This code will indeed work, but we can do better. There are a couple issues with the code above:
-
Traversal: For every slide, we are traversing the DOM for the
#slideselement. This is wasteful and unnecessary. Also, as we'll certainly be working with this#slidescontainer element throughout our project, it makes sense to store it as a property of ourSlidesobject. We'll do this shortly. - Reflows: This code will create any number of page reflows, which can increase the load time of our page. Rather than calling the
appendTo()method dozens of times (or in our case: six), let's limit our reflows to one.
Traversal
Let's first fix the traversal issue.
var Slides = {
   totalSlides : '',
   container : $( "#slides" ),

   init() { ... },
   loadContent() { ... }
}
This way, we search our document for the #slides element exactly once, rather than over and over.
If you're still confused about the advantages to this, think of it as jumping into a pool, and searching for a coin. Every time you call
$('#slides'), the JavaScript engine jumps in the pool and looks for that coin again. Over and over. But, if we instead store the location of$('#slides')in a variable, it never has to jump back into that pool. It remembers where that coin is.
Reflows
Next, we'll take care of that pesky reflow issue. There are two ways to limit our reflows. We'll examine both methods.
Document Fragments
JavaScript document fragments allow us to store chunks of HTML. Then, rather than updating the DOM multiple times, as we did before, with this method, we only call appendTo() once.
Refer here for more information on document fragments.
loadContent : function() {
   var frag = document.createDocumentFragment(),
      bit;

   for ( var i = 0; i < Slides.totalSlides; i++ ) {
      bit = $('<div id="#slide-' + i + '">'</div>')
         .load('slides/' + i + '.html')[0];
      frag.appendChild(bit);
      }
   Slides.container.append(frag);
}
Note that we're no longer calling appendTo() within the for statement. Instead, it's only being called once. The only note worth mentioning is the [0] section, after we call the load() method. What do we need that for?
Document fragments store -- wait for it -- HTML fragments, or elements. However, when we called the load() method above, the jQuery object is, of course, returned. That's not compatible. Instead, we want to filter down to the HTML element, itself. We can do so by using [0], or the get() method. Either option will do.
Hide the Container
Our second option is to hide the container element. When we do so, regardless of how many times you append new elements to that element, no additional page reflows will take effect...because the element is hidden! It's a nice little trick to have in your tool belt.
loadContent : function() {
  // Hide the container.
   Slides.container.hide();

   for ( var i = 0; i < Slides.totalSlides; i++ ) {
      $(''<div id="#slide-' + i + '">'</div>')
         .load('slides/' + i + '.html')
         .appendTo(Slides.container);
      }

   // Now display the slides container again - causing exactly one reflow.
   Slides.container.show();
}
So either of these two options will do just fine. Choose whichever you prefer.
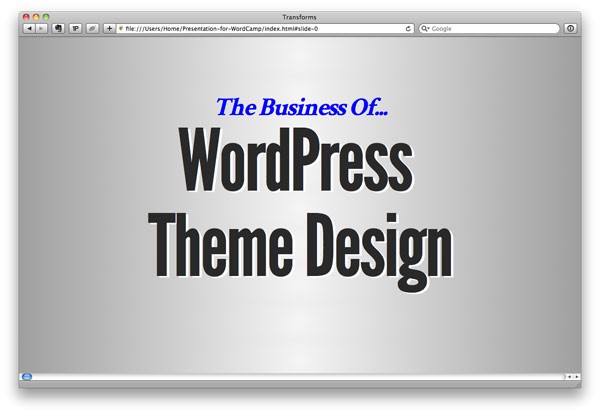
If you now view our project in the browser -- assuming you've added some dummy slides to the slides/ directory -- you'll see something along the lines of:
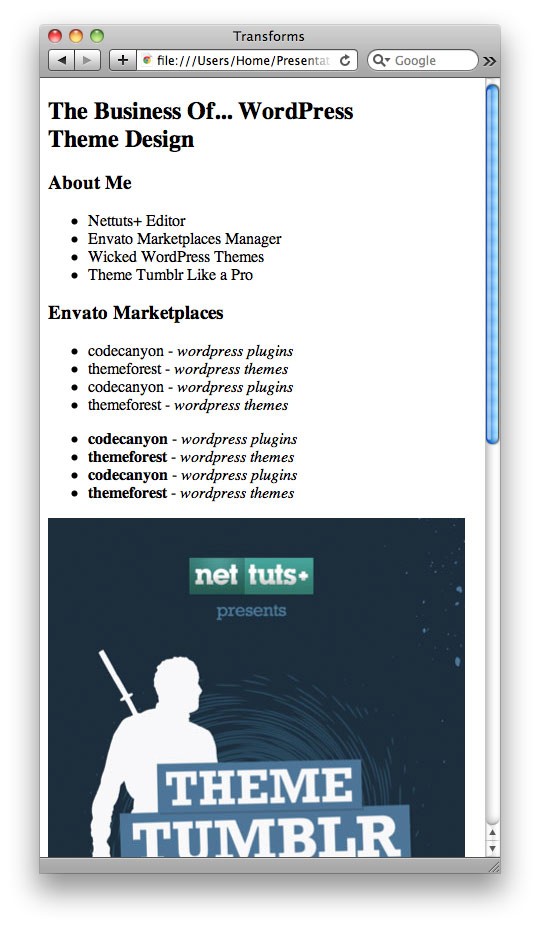
If we use a tool like Firebug or Chrome's developer tools, we'll see that, as expected, the slides have been inserted into the #slides container div.

5 - Make it Pretty
Our next step takes place within our stylesheet. We'll be focusing on both aesthetics as well as function here. To make each slide translate from left to right, we'll need to be clever with our styling.
We'll begin by creating our canvas. If you refer back to our markup...
<!DOCTYPE HTML>
<html>
<head>
   <meta charset="utf-8">
   <link href="style.css" rel="stylesheet" />
   <title>My Great Presentation</title>
</head>

<body>

 <div class="wrap">
   <div id="slides">
      <!-- load in slides -->
   </div>
 </div>

<script src="https://ajax.googleapis.com/ajax/libs/jquery/1.5.2/jquery.min.js"></script>
</body>

</html>
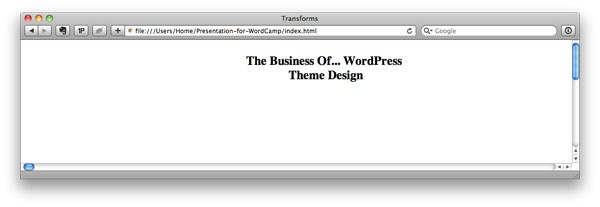
...our wrapping container for our project is the div with a class of wrap. We'll provide a width of 1180px and center it on the page.
.wrap {
   margin: auto;
   width: 1180px;
   overflow: hidden; /* because children will be floated */
}
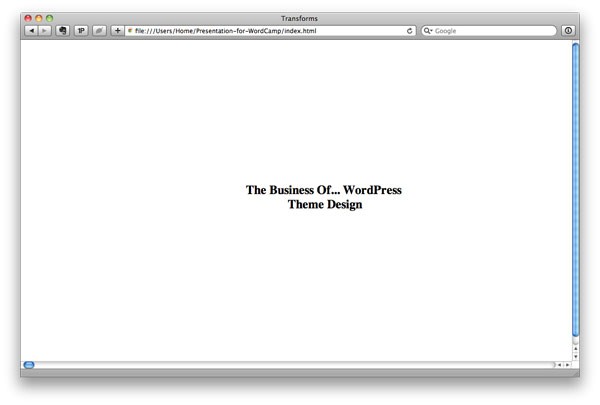
Next, because each slide should translate horizontally, we need to make our #slides div as wide as possible.
#slides {
	width: 999999px;
}
Now, the fun -- and a little scary -- part. Think of a traditional presentation slide. Isn't the content typically both vertically and horizontally centered on the slide, or page? Absolutely. Because we have 100% control over this project, we don't need to worry about browser compliance. As the slides will only ever be used by us (during our presentation), we're free to tailor it to our favorite browser. This way, we get to use lots of fun new features that haven't yet made their way into all the browsers, such as the Flexible Box Model.
We'll begin by specifying the dimensions for each slide, floating each slide, and providing some breathing room (margins).
#slides > div {
	height: 600px;
	width: 1180px;
	float: left;
	margin-right: 200px;
	text-align: center;
}
But remember: that text needs to be vertically centered. Flexible Box Model to the rescue!
#slides > div {
	height: 600px;
	width: 1180px;
	float: left;
	margin-right: 200px;
	text-align: center;

        /* Flexible Box Model */
        display: -webkit-box;
	-webkit-box-align: center;
	-webkit-box-orient: horizontal;
	-webkit-box-pack: center;

	display: box;
	box-align: center;
	box-orient: horizontal;
	box-pack: center;
}
Next, we'll add a nice radial gradient background to our slides. To be honest, CSS radial gradients still baffle me. I rarely remember the syntax. As such, I typically either make note of gradients in the wild that I like, or use any of the various gradient generators on the web to make mine. Feel free to do the same.
body {
	background-image: -webkit-gradient(
		radial,
		50% 50%, 0,
		50% 50%, 1000,
		from(rgba(245,245,245,1)),
		to(rgba(100,100,100,1))
	);
}
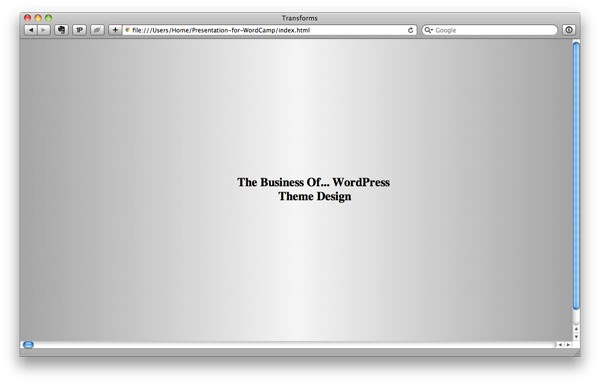
And, with that, we have our basic structure in place. At this point, I encourage you to being styling your headings, perhaps creating a minimal grid, and anything else you can think of. We'll finish our minimal styling by working on typography.
#slides h1,
#slides h2,
#slides h3,
#slides h4,
#slides h5 {
	color: #292929;
	font-family: 'League Gothic', sans-serif;
	letter-spacing: -5px;
	margin-top: 0;
	text-shadow: 5px 3px 0 white;
}
#slides > div h2 {
	font-size: 180px;
	line-height: 1em;
	margin: 0;
}
It's amazing what we can achieve when we tweak letter-spacing, and apply some clever text shadows! Looks much better now!

6 - Next Slide, Please
The next step in this project is to handle the process of transitioning from slide to slide. Naturally, as there are no buttons in place, we should instead listen for when either the left or right arrow keys are pressed. We'll store this functionality in a new keyPress method of our Slides object.
var Slides = {
   ...
   init : function() { ... },
   loadContent: function() { ... },
   keyPress : function() {
      $(document.body).keydown(function(e) {
         // if left or right arrow key is pressed
         if ( e.keyCode === 39 || e.keyCode === 37 ) {
            e.preventDefault();
            ( e.keyCode === 39 ) ? Slides.next() : Slides.prev();
         }
      });
   }

}
jQuery provides the helpful keydown method, which will attach the necessary event listeners. This means that the passed callback function will run for every key that is pressed; however, we're only interested in the right and left arrow key, or key codes 39 and 37, respectively. If one of these keys is pressed, we first cancel the default action of the arrow key, and then call either the next() or prev() method, dependent upon which key was pressed.
Next Slide
Let's now work on that next() method that we called above. When this method is called, it needs to execute a few operations:
- Update the hash in the URL. That way, we can easily send out links to specific slides.
- Animate the slide to the left, and reveal the next slide in the sequence.
But before moving forward, how do we know how much to translate the slide? It needs to be the width of the #slides container, but we should try not to hardcode that value into our JavaScript if we don't have to. The reason for this is because, if we later decide to change the dimensions of our canvas, we'd also need to dig into our JavaScript file and update the dimensions as well. Instead, let's dynamically determine what the width and margins of the container is.
Let's add a new property to the Slides object, called slideWidth. However, we won't be able to determine the width of the slides until they've been inserted into the DOM, via the loadContent method.
var Slides = {
   ...
   // New property stores the width of each slide
   slideWidth : '',
   ...

   init : function( totalSlides ) { ... },

   loadContent : function() { ... },

   // Determine the width of the slide...
   setSlideWidth : function() {
      var each = Slides.container.children( 'div' );
      Slides.slideWidth = each.width() + ( parseInt( each.css('margin-right'), 10 ) );
   }

}
Yikes - this line looks a bit scary!
Slides.slideWidth = each.width() + ( parseInt( each.css('margin-right'), 10 ) );
But don't worry; it's really quite simple. We're updating the Slides.slideWidth property, and are making it equal to the width of the slide plus its margin right. Because retrieving the margin-right value of the slides (specifically the first one) will return px as well, we need to slice that off, by using the parseInt function.
To clarify the need for casting, assuming that the margin right value is equal to 200px...
console.log ( typeof each.css('margin-right').split('px')[0] ); // value is 200. Typeof is still string, not integer.
And with that out of the way, we're now dynamically determining the width of our slides. Back to our next()method; at all times, we need to track the positioning of our slides. That way, when we transition from slide four to five, we know exactly how much to translate the slide. We'll store this value in a new property: translateAmount.
translateAmount : '',
next : function() {
   Slides.translateAmount -= Slides.slideWidth;
}
Let's break it down. When we press the right arrow key the first time, we set the translateAmount property equal to the slideWidth, or in our case, 1380px. If we press right again, this value will be updated to 2760px.
Update the Hash
Within this next method, we should also update the hash value in our url, such as example.com/index.html#slide-1, then example.com/index.html#slide-2, etc. To do so, we need to keep track of the current slide that the reader is viewing.
currentSlide : 0,

...
next : function() {
   Slides.translateAmount -= Slides.slideWidth;
   Slides.updateHash( ++Slides.currentSlide );
},

updateHash : function() {
   location.hash = '#slide-' + Slides.currentSlide;
}
Note that we're increasing the value of currentSlide by one before passing it to the updateHash function. This is appropriate; when we press the right arrow key, the hash should be updated to the next slide, not the current one.
Animate the Slide
Finally, now that we've tracked all of the necessary values, we can animate the slides.
next : function() {
   Slides.translateAmount -= Slides.slideWidth;
   Slides.updateHash( ++Slides.currentSlide );
   Slides.animate();
},

animate : function() {
   Slides.container
      .children()
         .css( '-webkit-transform', 'translateX(' + Slides.translateAmount + 'px)');
}
For best performance, we'll take advantage of CSS3 to translate the slides. In order for this to not be an instant translation, we need to update our CSS file:
#slides div {
   ...
   -webkit-transition: all 1s linear;
   transition: all 1s linear;
}
And the Previous Slide, Please
The prev method will be really similar to the next method, except for a couple things.
prev : function() {
  // No more left to go back.
   if ( Slides.translateAmount === 0 ) return;

   Slides.translateAmount += Slides.slideWidth;
   Slides.updateHash( --Slides.currentSlide );
   Slides.animate();
}
This time, as we're transitioning back to the beginning of the slides, we need to reverse the translateAmount and hash value. Also, we must consider the possibility that the user is pressing the left arrow key even when they're on the very first slide. If that happens to be the case, we shouldn't do anything, as there's nothing left to transition to!
Final JavaScript
var Slides = {
   container : $('#slides'),

   totalSlides : '',

   translateAmount : 0,

   currentSlide : 0,

   slideWidth : '',

   init : function(totalSlides) {
      var each;

      if ( !totalSlides ) throw new Error('Please pass the total number of slides.');
      Slides.totalSlides = totalSlides;

      Slides.loadContent();

      each = Slides.container.children('div');

      // Determine the width of our canvas
      Slides.slideWidth = each.width() + ( parseInt( each.css('margin-right'), 10 ) );

      Slides.keyPress();
   },

   loadContent : function() {
      Slides.container.hide();
      for ( var i = 0; i < Slides.totalSlides; i++ ) {
         $('<div id="#slide-' + i + '"></div>')
            .load('slides/' + i + '.html')
            .appendTo(Slides.container);
         }
      Slides.container.show();
   },

   keyPress : function() {
      $(document.body).keydown(function(e) {
         // if left or right arrow key is pressed
         if ( e.keyCode === 39 || e.keyCode === 37 ) {
            e.preventDefault();
            ( e.keyCode === 39 ) ? Slides.next() : Slides.prev();
         }
      });
   },

   next : function( ) {
      Slides.translateAmount -= Slides.slideWidth;
      Slides.updateHash( ++Slides.currentSlide );
      Slides.animate();
   },

  prev : function() {
     // No more left to go back.
      if ( Slides.translateAmount === 0 ) return;

      Slides.translateAmount += Slides.slideWidth;
      Slides.updateHash( --Slides.currentSlide );
      Slides.animate();
  },

  animate : function() {
     Slides
      .container
      .children()
         .css( '-webkit-transform', 'translateX(' + Slides.translateAmount + 'px)' );
  },

  updateHash : function( direction ) {
     // Update current Slides and hash.
     location.hash = '#slide-' + Slides.currentSlide;
  }
};

// All right; let's do this.
Slides.init(6);
Complete
All finished. That wasn't too hard, once we dug in a bit! The great thing is that, if you view the presentation on a really high or low resolution, you can simply zoom in or out a few clicks to compensate, by pressing Command or Control +-. Let me know if you have any questions or recommendations!

Comments