When site owners install a new WordPress theme, the first thing they want to do is to tweak its look and feel to match their branding or personal preference. And most of the time, the people who buy, download, or install WordPress themes have little or no coding experience.
So how do you, as a theme developer, enable the end users of your theme to have as much control as possible over the look and feel of their site without having to learn to code?
By creating
options pages/panels, of course!
However, theme options pages are not easy to create—especially for those developers who don’t have much experience with WordPress or programming in general. Luckily, there are options frameworks.
What Are Options Frameworks?
Options frameworks are code libraries, plugins or classes that provide a solid foundation that developers can easily and quickly build upon to create and add options pages to their themes. This enables non-developers to use such panels to quickly customize the look and feel of their site, without touching code.
Options panels can be used to:
- upload a logo
- change the background color or any CSS property of an element (such as the header or footer of your theme)
- select a pre-defined skin or layout
- add custom CSS or JavaScript
- and more
Basically, options panels can place the power into the hands of your themes’ users by enabling them to change almost any aspect of their site’s design.
In this series, we are going to look at a very popular and widely-used options framework—Redux Framework.
This series will be divided into the following parts:
- Part 1: Introducing Redux Framework and Integrating It Into Your Theme
- Part 2: Adding Sections and Fields & Working With Configuration Settings
- Part 3: Using the Options in Your Theme (and Widgets)
- Part 4: Alternatives to Redux
- Part 5: Conclusion
What Is Redux Options Framework?
Redux Framework is an options framework that was born out of the combination of four frameworks, namely:
- NPH, which was created by Lee Mason with the aim of creating a framework that was compatible with ThemeForest’s submission requirements
- SMOF
- SimpleOptions, which is a merger of the above frameworks, created by Dovy Paukstys
- An earlier version of Redux (Redux 2.0), created by Daniel Griffiths and based on NPH
The Redux core team consists of these three developers. The project is under active development, with updates released quite regularly.
Redux Features
- Uses the WordPress Settings API
- Multiple field types
- Built-in validation classes
- Extensible
- Import/export functionality, enabling you to port settings across sites
Why Redux?
- Free: Redux is free and 100% open source. You can use it in both personal and commercial projects without paying a cent.
- ThemeForest-Compliant: Redux meets Envato’s submission requirements, making it a good option for theme developers wishing to develop themes or plugins to be sold in Envato’s marketplaces.
- Popular: Redux is used by over 250 (known) items in the Envato marketplaces that have sold for well over $6 million. This popularity alludes to the power of this framework.
- Easy to Use: If you understand how arrays work, than you can use Redux. Getting started with Redux is as simple as creating a configuration object that consists of nothing more than nested arrays.
- Flexible: If it doesn’t quite meet your needs, Redux can be extended to create custom fields and validation/error handling.
- Well-Documented: Redux is well documented. The Redux website has a knowledge base, codex (developer documentation), and video tutorials.
- Strong Community: A strong community has mushroomed around Redux. If you are having a little trouble and would like help, you’ll probably find someone who has encountered the same problem before. And if it’s a feature you require, then more than 50 contributors will be willing to listen (and perhaps add it in the next release).
Installing Redux
There are several ways to install Redux. But for the purpose of this tutorial, we are going to install it from WordPress.org.
Install the plugin as you would any plugin:
- Go to Plugins > Add New.
- In the search box, enter
Redux Frameworkand then click Search Plugins. - From the results page, click Install Now on the first entry.
- After you install it, proceed to activate it as you would any other plugin.
Activating Demo Mode
To activate demo mode, go to Plugins > Installed Plugins and scroll to Redux Framework. You will see something like this:

Click Activate Demo Mode.
This will activate the demo mode and create a sample options panel called Sample Options in the WordPress Dashboard.
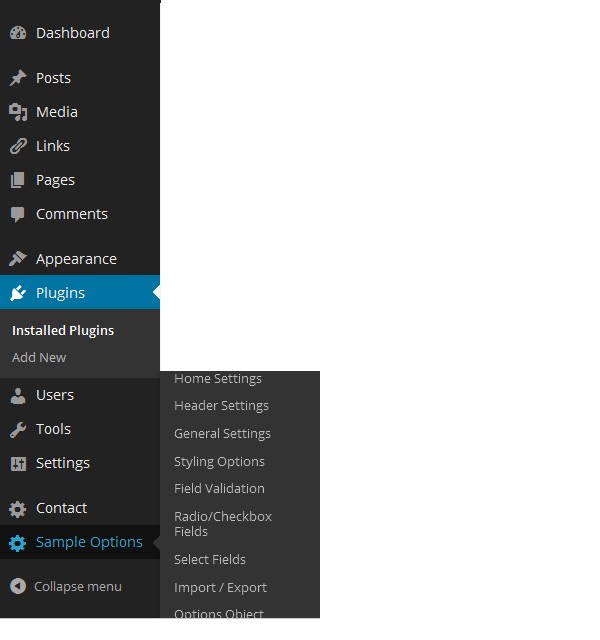
Demo Mode and the Sample Options page will allow you to play around with Redux and explore the various field types that it allows you to create.
Integrating It Into Your Theme
So far we have installed Redux and activated the Demo mode to allow us to explore the different fields that Redux allows us to create.
To integrate Redux into our theme, we have to initialize it with a new configuration file. Follow these steps to initialize a new instance of Redux:
- Navigate to the
redux-frameworkdirectory within your WordPress Plugins directory (wp-content/plugins/) and copy thesampledirectory to your theme.
- Open your
functions.phpfile and add the following line of code:
<?php

 require_once (dirname(__FILE__) . '/sample/sample-config.php');

?>
When you refresh your WordPress Dashboard and hover over Sample Options, you will notice that nothing has changed—you still have the same sub-menus as before. This is because our configuration is exactly the same as before. We simply moved the config file from the Redux plugin directory to our theme directory.
Furthermore, you might see the following error message:

This is due to the fact that we are loading two identical config files. You can fix this by going to the Plugins panel and deactivating Demo Mode.

What we want to do is to start with a blank config file. Redux comes with one for your convenience. So let’s link to it instead.
To do so, change the line you just
added to your functions.php from:
<?php
require_once (dirname(__FILE__) . '/sample/sample-config.php');
?>
To:
<?php
require_once (dirname(__FILE__) . '/sample/barebones-config.php');
?>
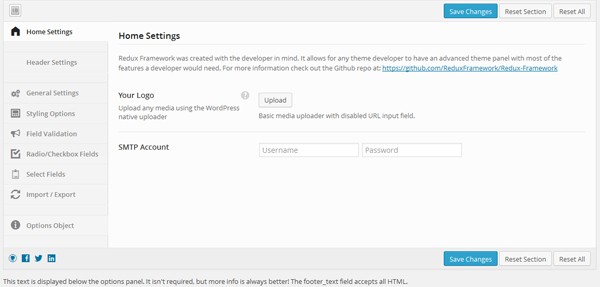
If you go back to your Dashboard, you will realize that our Sample Options panel contains one section—Home Settings—and one field, a media uploader field aptly named Web Fonts.

We now have a barebones config class that we can add sections and fields to.
Conclusion
In this first part of the series, we looked at Redux Framework, what is and why it's worth using it in your projects. We went ahead and installed a fresh installation of Redux and examined the different features it affords us as theme developers.
We also created our own barebones configuration files to demonstrate how we can begin to tweak Redux to meet our specific needs.
In the next tutorial in the series, we are going to learn how we can add more sections, and also look at adding fields to these sections.

Comments