In this tutorial, we are going to explore Magento blocks, one of the essential components of the Magento architecture. We'll see the difference between structural and content blocks. I'll also demonstrate how you can create custom blocks programmatically.
What Are Blocks in Magento?
In the Magento architecture, a "Block" is one of the first class elements in the structure of Magento layouts. Every page in Magento is decorated by the "Layouts" file and the content is filled up by the "Blocks" of the different modules. Magento blocks are a really powerful and flexible way to plug your content into the already existing layouts. On the other hand, you could also use layout XML files to easily remove or reposition any existing blocks.
There is no surprise that considering the flexibility of the Magento architecture, you could also develop your own blocks using a custom module in Magento. Say, for example, you would like to pull a couple of special products for the upcoming festive season, and you want to display them on the front page. In that case, you could easily accomplish the task by implementing a custom block. And yes, it's the main goal of this tutorial as well!
Structural Blocks vs. Content Blocks
Before we move ahead to our custom block mission, I would like to explain the difference between structural and content blocks. Let's have a quick look at each type of block.
Structural Blocks
We could say that "Structural Blocks" are the containers holding the "Content Blocks". Structural blocks themselves don't have any actual content to display, but they in turn display the content blocks at the end. As the name suggests, they're used to structure the content of the whole page.
For example, "Header", "Footer", "Left" and "Right" are structural blocks in Magento. "Content blocks" are assigned to the different structural positions of the layout of the Magento page, which in turn displays the actual content of the content blocks.
Content Blocks
"Content Blocks" are the real fire power, generating the actual content for the display. As we've just discussed in the previous section, you need to assign the content block to one of the structural blocks for the front-end display. There are some other ways which allow us to insert the content blocks using short codes, but we'll see more on that later.
Content blocks can be of any form, from a simple static content block to a list of the most recent products on the home page! In fact, the majority of the content is generated by the content blocks spread all over the different modules in Magento.
So by now, you should understand the basic difference between the two types of blocks in Magento. So let's jump in and start the custom block development!
Custom Block Development
We're going to develop a very basic custom Magento module for the development of our custom block. Our custom block will be a simple block displaying the most recent products available in the store.
I assume that you're familiar with the basic structure and conventions of the Magento module files. Now, let's see the file structure we'll need to implement for our custom block.
-
app/etc/modules/Envato_All.xml: It's a file used to enable our custom module. -
app/code/local/Envato/Recentproducts/etc/config.xml: It's a module configuration file. -
app/code/local/Envato/Recentproducts/Model/Recentproducts.php: It's a model file which provides the array of most recent products. -
app/code/local/Envato/Recentproducts/Block/Recentproducts.php: It's the main block file for our custom block. -
app/design/frontend/default/default/template/recentproducts/recentproducts.phtml: It's a template file which contains the XHTML-related stuff.
Setting Up the Files
As per the Magento conventions, first we need to create the module enabler file. Create app/etc/modules/Envato_All.xml and paste the following contents into that file. We've used Envato as our module namespace and Recentproducts as our module name. It'll enable our Recentproducts module by default.
<!-- app/etc/modules/Envato_All.xml -->
<?xml version="1.0"?>
<config>
<modules>
<Envato_Recentproducts>
<active>true</active>
<codePool>local</codePool>
</Envato_Recentproducts>
</modules>
</config>
Create app/code/local/Envato/Recentproducts/etc/config.xml and paste the following contents in that file. We've just declared the model and block class names as per the Magento module XML file conventions.
<!-- app/code/local/Envato/Recentproducts/etc/config.xml -->
<?xml version="1.0"?>
<config>
  <modules>
    <Envato_Recentproducts>
      <version>1.0</version>
    </Envato_Recentproducts>
  </modules>
  <global>
    <blocks>
      <recentproducts>
        <class>Envato_Recentproducts_Block</class>
      </recentproducts>
    </blocks>
    <models>
      <recentproducts>
        <class>Envato_Recentproducts_Model</class>
      </recentproducts>
    </models>
  </global>
</config>
Now, create the model file at app/code/local/Envato/Recentproducts/Model/Recentproducts.php. Paste the following contents in the model file.
<?php
// app/code/local/Envato/Recentproducts/Model/Recentproducts.php
class Envato_Recentproducts_Model_Recentproducts extends Mage_Core_Model_Abstract {
public function getRecentProducts() {
$products = Mage::getModel("catalog/product")
->getCollection()
->addAttributeToSelect('*')
->setOrder('entity_id', 'DESC')
->setPageSize(5);
return $products;
}
}
So as you can see, we've just declared a method getRecentProducts which will return the five most recently added products.
Further, create the app/code/local/Envato/Recentproducts/Block/Recentproducts.php file and insert the following code in that file.
<?php
// app/code/local/Envato/Recentproducts/Block/Recentproducts.php
class Envato_Recentproducts_Block_Recentproducts extends Mage_Core_Block_Template {
public function getRecentProducts() {
// call model to fetch data
$arr_products = array();
$products = Mage::getModel("recentproducts/recentproducts")->getRecentProducts();
foreach ($products as $product) {
$arr_products[] = array(
'id' => $product->getId(),
'name' => $product->getName(),
'url' => $product->getProductUrl(),
);
}
return $arr_products;
}
}
In the context of the tutorial, it's one of the most important files we're looking for! Yes, it's a file related to our custom block.
In this file, we'll call our model method getRecentProducts to load the array of the products using the Mage::getModel beauty of Magento. Next, we'll iterate through the data and set up the $arr_products array which will be needed in our block template file.
Finally, we'll need a make a template file at app/design/frontend/default/default/template/recentproducts/recentproducts.phtml. It contains the XHTML code related to the products display.
<?php
// app/design/frontend/default/default/template/recentproducts/recentproducts.phtml
$products = $this->getRecentProducts();
?>
<div id="product_list">
<h1>Recent Products</h1>
<?php if (is_array($products) && count($products)) { ?>
<?php foreach($products as $product) { ?>
<div>
<a href="<?php echo $product['url'] ?>"><?php echo $product['name'] ?></a>
</div>
<?php } ?>
<?php } ?>
</div>
First, we are fetching the products array using the getRecentProducts method of the block. Once we get that, we simply iterate through the data and prepare the XHTML code for our block. It's as simple as that!
We've finished with our custom block module, so in the next section we'll see how we could use the block short codes to display our block in the front-end pages.
Testing the Front-End
As we discussed earlier, content blocks are displayed by assigning them to one of the structural blocks. And yes, you can assign the custom blocks in the same way the other core blocks in the Magento are assigned, either by layout files or CMS pages.
To insert your custom block using the layout update file, you can use the following code.
<block type="recentproducts/recentproducts" name="recentproducts_recentproducts" template="recentproducts/recentproducts.phtml"></block>
On the other hand, if you want to display your custom block using the CMS page, here is the code you should use.
{{block type="recentproducts/recentproducts" name="recentproducts_recentproducts" template="recentproducts/recentproducts.phtml"}}
Let's see quickly how it looks in the front-end when it's inserted through one of the CMS pages. Log in to your Magento back-end and go to CMS > Pages, and add a new CMS page using Add New Page. Fill in the required information, and paste your block short code as shown in the following screenshot.

Save the page and go to the front-end to see how it looks!
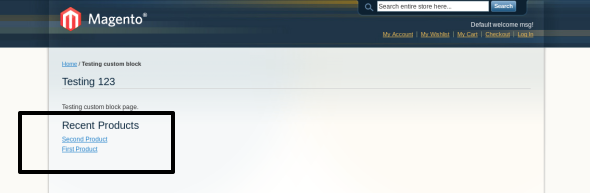
Looks great, doesn't it? So that's it for now, and I'll be back with some more exciting stuff. Love to hear your thoughts using the feed below.

Comments